
Reef Tank Setup Guide for Beginners: How to Start a Reef Aquarium
Meta Description: New to reef keeping? This beginner reef tank setup guide covers tank size, equipment, cycling, water parameters, starter corals, and smart automation tips.
AQUATIC
Pet Ecosystems Team
5/15/202610 min read
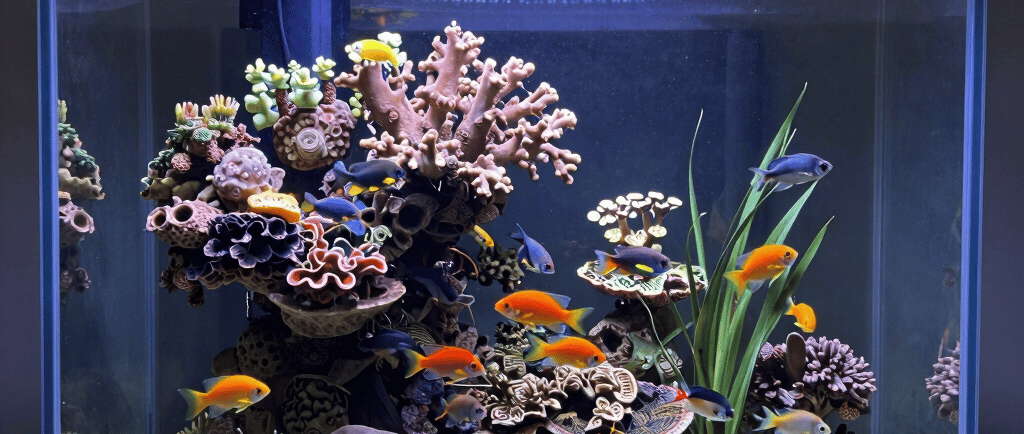
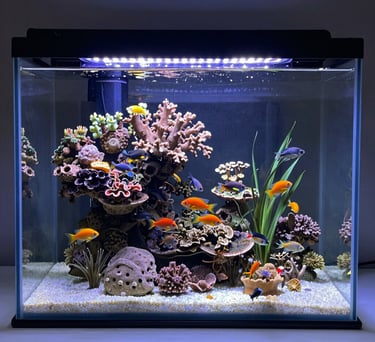
Reef Tank Setup Guide for Beginners: Everything You Need to Start a Reef Aquarium
A reef aquarium is one of the most visually stunning things you can build. Living coral colonies, vibrant marine fish, shrimp cleaning every rock surface, and a slice of the ocean that evolves on its own over months and years — nothing else in the pet hobby comes close.
It is also one of the most commonly abandoned hobbies, for one reason: beginners rush the process, skip the fundamentals, and get frustrated when things go wrong in a tank that was never properly established to begin with.
This guide does not glamorize reef keeping or bury the hard parts. It gives you an honest, step-by-step framework for setting up a reef aquarium correctly from the beginning — so your first reef becomes something you keep for years, not something you tear down after six months.
Already deep into planning? Read our Best Smart Aquarium Systems Guide → and Best Reef Tank Lights Guide → for equipment deep-dives.
What a Reef Tank Actually Is (And How It Differs From a Fish-Only Setup)
A reef tank is a saltwater aquarium designed to sustain living corals alongside fish and invertebrates. The defining difference from a standard marine setup is that corals are photosynthetic — they require specific light spectrums and intensities to survive — and calcifying, meaning they continuously consume calcium and alkalinity from the water as they grow.
This changes everything about how the tank is managed. A fish-only saltwater tank primarily needs stable temperature, salinity, and a functional nitrogen cycle. A reef tank needs all of that plus:
Controlled lighting on a consistent daily schedule
Stable calcium, alkalinity, and magnesium levels
Strong, directional water flow across coral surfaces
Extremely low nutrient levels (nitrate ideally under 10 ppm, phosphate under 0.1 ppm)
pH stability in the 8.1–8.3 range
Every piece of equipment you choose — and every decision you make during setup — should be evaluated against these requirements.
Step 1: Choose the Right Tank Size
The single most important decision a new reef keeper makes is tank size, and almost every beginner gets the logic backwards.
Smaller tanks seem easier to manage. They cost less, fit more places, and feel less intimidating. In reef keeping, smaller tanks are actually harder to maintain because water chemistry in a small volume changes faster and more dramatically in response to any disturbance — a skipped water change, an overfeeding session, or a heater malfunction.
The practical recommendation for beginners: 40–75 gallons.
This range provides enough water volume that parameter swings happen slowly enough to catch and correct before they cause damage. It is large enough to house a meaningful coral and fish selection while remaining manageable in terms of cost, space, and maintenance workload.
Nano reefs under 20 gallons can be done successfully, but they require more frequent attention, more precise feeding, and faster response to problems. They are genuinely better suited to experienced reefers managing a display tank alongside a larger established system — not as a beginner's entry point.
Step 2: Assemble Your Core Equipment
Filtration System
Reef tanks rely on a combination of three filtration types working together:
Biological filtration is the foundation — beneficial bacteria colonies that convert toxic ammonia (from fish waste) to nitrite, then to nitrate. Live rock and porous filter media provide the surface area these bacteria colonize. No reef tank can function without a fully established biological filter, which is why cycling the tank before adding livestock is non-negotiable.
Mechanical filtration physically removes suspended particles — uneaten food, detritus, algae fragments — before they break down and raise nutrient levels. Filter socks, filter floss, and roller filter systems handle this. Mechanical filtration requires regular cleaning; a clogged filter sock becomes a nitrate factory.
Chemical filtration uses activated carbon, GFO (granular ferric oxide), or similar media to remove dissolved organics, excess phosphate, and impurities that biological and mechanical filtration cannot address. Run carbon passively at all times in most reef setups.
Protein skimmers deserve a separate mention. A skimmer removes dissolved organic compounds before they complete the nitrogen cycle and become nitrate — pulling the equivalent of several water changes worth of waste out of the water continuously. For most reef tanks over 40 gallons, a quality protein skimmer is essential equipment.
Lighting
Corals cannot survive without reef-appropriate lighting. The spectrum, intensity, and photoperiod all directly affect coral health, growth rate, and coloration.
In 2026, programmable LED systems are the standard across every level of the hobby. Choose a fixture sized for your tank's footprint and the coral types you plan to keep — soft corals and LPS require moderate PAR, while SPS corals need high-intensity lighting with strong blue spectrum output.
Program a consistent 8–10 hour photoperiod with gradual ramp-up and ramp-down at each end. Never place corals under full intensity immediately — start at 20–30% and increase by 10% per week over 4–6 weeks while monitoring for bleaching or browning.
For a complete lighting breakdown, read our Best Reef Tank Lights for Coral Growth →
Water Flow
Corals require water movement across their surfaces to deliver food, remove waste, and prevent detritus settlement. Without adequate flow, dead zones form in the rockwork and on coral bases, creating conditions for bacterial infection and tissue necrosis.
Target flow rate: 20–30 times the tank volume per hour for a typical mixed reef. A 50-gallon tank needs 1,000–1,500 GPH of total circulation from powerheads plus the return pump.
Wavemakers and alternating flow patterns are preferable to a single directional current — natural reef environments have variable, turbulent water movement, and replicating this produces better coral behavior and growth outcomes.
Heater and Temperature Control
Reef tanks maintain stable temperatures between 76–80°F (24–27°C). A swing of more than 2°F in either direction within 24 hours is enough to stress sensitive corals.
Use a high-quality titanium or glass heater with an external controller — do not rely on the heater's built-in thermostat alone. Heater failures (both stuck-on and stuck-off) are one of the most common causes of reef tank losses. An external temperature controller cuts power to the heater independently of its internal thermostat, providing redundancy against both failure modes.
For tanks over 50 gallons or in warm climates where ambient temperature pushes water above 80°F, a small aquarium chiller is worth the investment.
Step 3: Cycle the Tank Before Adding Anything
Understanding the Reef Tank Nitrogen Cycle
The nitrogen cycle is the biological process that makes a reef aquarium safe for fish and corals. Skipping or rushing this step is one of the most common causes of livestock loss in new reef tanks.
The Cycle Works in Three Stages
Stage 1: Ammonia Accumulates
Ammonia enters the system through fish waste, decaying organic matter, uneaten food, or a bottled ammonia source used during fishless cycling.Stage 2: Nitrosomonas Bacteria Establish
These beneficial bacteria convert toxic ammonia into nitrite. While less dangerous than ammonia, nitrite is still harmful to marine livestock.Stage 3: Nitrobacter Bacteria Establish
A second group of beneficial bacteria converts nitrite into nitrate, which is much less toxic and can be controlled through water changes and nutrient export methods.
When Is a Reef Tank Fully Cycled?
A reef tank is considered cycled when:
✅ Ammonia tests at 0 ppm
✅ Nitrite tests at 0 ppm
✅ The tank can process an added ammonia source without producing detectable ammonia or nitrite
Typical cycling times:
⏳ 4–8 weeks for a brand-new aquarium
⚡ 2–4 weeks when using established live rock, mature filter media, or bacterial supplements
Popular bacterial starters include:
✅ Dr. Tim's One & Only
✅ Fritz TurboStart
Important Warning
❌ Do not add fish or corals until the cycle is complete.
A partially cycled reef tank cannot safely process waste. Even if salinity, temperature, and pH appear stable, ammonia and nitrite spikes can stress, injure, or kill livestock within days.
Target Water Parameters Before Adding Livestock
✅ Temperature: 76–80°F
✅ Salinity: 1.025–1.026 specific gravity (35 ppt)
✅ pH: 8.1–8.3
✅ Ammonia: 0 ppm
✅ Nitrite: 0 ppm
✅ Nitrate: Below 10 ppm
✅ Alkalinity: 8–10 dKH
✅ Calcium: 400–450 ppm
✅ Magnesium: 1,250–1,350 ppm
Step 4: Aquascape With the Long Term in Mind
Aquascaping — arranging live rock and structure inside the tank — is one of the most important and most rushed steps in reef setup. A poor aquascape creates problems that compound for years.
Principles of good reef aquascaping:
Open flow paths. Rock piled against the back glass blocks water circulation and creates detritus traps. Position rockwork away from the back and sides to allow flow behind and through the structure.
Stable foundations. Use reef-safe epoxy or aquarium putty to secure rock structures at contact points. A rock slide in an established reef crushes corals and can kill fish. Build structures that will not shift.
Leave room for growth. Beginner reefers consistently underestimate how large corals grow. A frag placed on top of a rock today may double or triple in size within 18 months. Space frags with their adult size in mind, not their current size.
Minimize sand contact for rock. Direct rock-on-sand contact creates low-flow dead zones where detritus accumulates and anaerobic bacteria produce hydrogen sulfide. Use rock feet, PVC legs, or an egg-crate base to keep the rock structure slightly elevated.
Step 5: Start With Forgiving Corals
The most reliable path to a thriving reef is a deliberate, patient stocking sequence — beginning with the most forgiving species and advancing to more sensitive ones as the tank matures.
Beginner-Friendly Corals (Months 1–6)
Beginner-Friendly Corals for New Reef Tanks
✅ Zoanthids — Require low to moderate lighting and low to moderate water flow. Extremely hardy, colorful, and widely considered one of the easiest corals for beginners.
✅ Mushroom Corals (Discosoma) — Thrive under low to moderate lighting with low flow. Very forgiving of minor water parameter fluctuations, making them ideal for first-time reef keepers.
✅ Green Star Polyps (GSP) — Prefer low to moderate lighting and moderate flow. Fast-growing and resilient, though they can spread aggressively if not contained.
✅ Leather Corals (Sarcophyton & Sinularia) — Do well with moderate lighting and moderate flow. Hardy soft corals that tolerate a wide range of conditions.
✅ Kenya Tree Coral — Requires low to moderate lighting and low to moderate flow. One of the easiest soft corals to keep and known for its rapid growth.
Difficulty Level Summary
✅ Very Easy: Zoanthids, Mushroom Corals
✅ Easy: Green Star Polyps, Leather Corals, Kenya Tree Coral
These corals are often recommended as starter species because they tolerate minor mistakes while allowing new reef keepers to gain experience before moving on to more demanding LPS or SPS corals.
These species tolerate the parameter fluctuations common in maturing tanks, grow quickly to provide visual reward, and forgive beginner mistakes that would kill more sensitive species.
Intermediate Corals (Months 6–18)
Moving to LPS Corals
Once your reef tank has maintained stable water parameters for several consecutive months, you can begin introducing LPS (Large Polyp Stony) corals.
Popular beginner-friendly LPS corals include:
✅ Hammer Coral — Known for its flowing tentacles and moderate care requirements.
✅ Torch Coral — Highly sought after for its movement and vibrant coloration, but requires stable water conditions.
✅ Frogspawn Coral — Hardy, visually striking, and closely related to hammer and torch corals.
✅ Brain Corals (Favia & Favites) — Colorful, durable corals that adapt well to mixed reef aquariums.
✅ Bubble Coral — Distinctive inflated polyps create a dramatic appearance and gentle movement.
✅ Duncan Coral — One of the easiest LPS corals to keep, with excellent growth and feeding response.
Why Reef Keepers Upgrade to LPS Corals
✅ Larger, more dramatic polyps
✅ Greater movement and visual appeal
✅ Wide variety of colors and growth forms
✅ Excellent centerpiece corals for mixed reef aquariums
While LPS corals are generally more forgiving than SPS species, they still require consistent salinity, alkalinity, calcium, and nutrient levels. Introducing them only after months of stability significantly improves long-term success.
Advanced Corals (18+ Months)
When to Add SPS Corals
SPS (Small Polyp Stony) corals are generally considered the most demanding corals in the reef hobby and should only be introduced to mature, stable aquariums.
Common SPS corals include:
✅ Acropora — The gold standard for advanced reef keepers, known for rapid growth and stunning coloration.
✅ Montipora — Often considered the most beginner-friendly SPS coral, though still requiring excellent stability.
✅ Stylophora — Hardy compared to many SPS species but sensitive to parameter swings.
✅ Pocillopora — Fast-growing and attractive, yet dependent on stable water chemistry.
SPS Coral Requirements
✅ Stable alkalinity with minimal daily fluctuations
✅ Consistent calcium and magnesium levels
✅ Stable pH and salinity
✅ Strong lighting and water flow
✅ Automated dosing or highly consistent manual supplementation
✅ Mature biological filtration and established nutrient balance
Important Consideration
⚠️ SPS corals are best reserved for established reef tanks that have maintained stable parameters for an extended period.
Many experienced reef keepers recommend waiting 12–18 months before attempting SPS-dominant systems. Introducing SPS too early is one of the most common causes of coral loss and frustration, as these corals react poorly to instability that soft corals and LPS species may tolerate without issue.
For most hobbyists, success comes from progressing gradually: soft corals → LPS corals → SPS corals, allowing the aquarium ecosystem to mature naturally at each stage.
How Smart Technology Makes Reef Keeping More Manageable
Modern reef automation does not replace good husbandry — it makes good husbandry consistent in a way that manual maintenance cannot match.
Automated dosing maintains alkalinity and calcium at stable levels daily, eliminating the single biggest source of parameter variance in established reef tanks.
Smart lighting controllers run the same precise photoperiod every day regardless of your schedule, ensuring corals receive consistent light exposure during every growth window.
Aquarium controllers with real-time monitoring alert you immediately when temperature, pH, or salinity moves outside safe ranges — giving you a response window measured in minutes rather than the hours it might take to notice the problem manually.
Auto top-off systems automatically replace evaporated water with fresh RO/DI, keeping salinity stable without daily manual additions.
For a new reef keeper, the priority automation sequence is: ATO first, then smart lighting, then a basic controller for temperature and alerts. Add dosing automation once the tank is established and you understand its specific alkalinity consumption rate.
Explore how smart technology integrates into a complete reef system: Best Smart Aquarium Systems Guide → · Best Aquarium Controllers →
Frequently Asked Questions
How long does it take to set up a reef tank? The physical setup — equipment installation and aquascaping — takes 1–2 days. The nitrogen cycle that makes the tank safe for livestock takes an additional 4–8 weeks. Plan for 6–10 weeks from first fill to first coral.
What is the cheapest way to start a reef tank? A 40-gallon all-in-one aquarium with integrated filtration, a quality LED light, and a basic protein skimmer represents the most cost-efficient path to a stable beginner reef. Expect to spend $600–$1,200 for a complete functional setup excluding livestock.
Do reef tanks need a sump? Not strictly required, but highly recommended for tanks over 40 gallons. A sump increases total water volume (improving stability), hides equipment from the display, and provides space for a protein skimmer, refugium, and additional filtration media.
How often do reef tanks need water changes? Most reef tanks benefit from 10–15% water changes every 1–2 weeks. Water changes replenish trace elements, remove accumulated nitrate and phosphate, and address parameter drift that dosing cannot fully correct.
What fish are safe for beginner reef tanks? Ocellaris or percula clownfish, royal grammas, firefish gobies, and tailspot blennies are all reef-safe, hardy, and well-suited to beginner setups. Avoid triggers, pufferfish, and large wrasses — all will harm corals or invertebrates.
How much does a reef tank cost to run monthly? Ongoing costs include: electricity ($20–$60/month depending on equipment), RO/DI water and salt mix ($15–$40/month), replacement filter media ($10–$20/month), and food ($10–$20/month). Total ongoing costs typically run $55–$140/month for a mid-sized reef.
Final Thoughts
A reef tank built correctly — right tank size, proper cycling, patient stocking — is one of the most stable and rewarding ecosystems in the pet hobby. The mistakes that end reef tanks early almost always trace to shortcuts taken in the first 60 days: insufficient cycle time, immediate coral additions, overlooked equipment compatibility.
Do the slow work at the beginning. Let the tank establish itself fully before adding livestock. Start with forgiving corals and build toward the species you ultimately want as the tank matures.
Every established reef tank you admire was, at some point, an empty box filled with saltwater and patience.
Ready to build your automation stack? Read our Best Smart Aquarium Systems Guide → and Best Aquarium Controllers Guide → for the full equipment breakdown.
Related: Best Reef Tank Lights for Coral Growth · Automated Water Lab Review · Aquatics Tech Guide
Affiliate disclosure: Pet Ecosystems participates in affiliate marketing programs. We may earn commissions from qualifying purchases made through links on this site at no additional cost to you. Our recommendations are based on independent research and editorial review.
Affiliate Disclosure:
Pet Ecosystems participates in affiliate marketing programs, which means we may earn commissions from qualifying purchases made through links on this website at no additional cost to you.
Our recommendations are based on independent research, product reviews, and editorial opinions intended to help pet owners discover quality products and smart solutions for their pets.
© 2026 Pet Ecosystems. All rights reserved.
Contacts
info@petecosystems.com